Gaming technology and peripherals have made quite a lot of progress since it began. We came from SEGA consoles and Family Computers and virtual reality was just a pipe dream then. But now, we can play games and interact with other people in the virtual plane all thanks to VR technology.
You can buy VR headsets made by different big technology brands like Google, HTC, Oculus, and Sony. However, VR peripherals are a bit pricey. It ranges from around $400 - $500 in the market and not everyone can afford it. Good thing there are cardboard templates for what a VR should look like. Now you can make a DIY VR headset of your own without emptying your pocket.
What is DIY VR Headset?
A DIY VR headset is something straight out of a craft station. It will look something like cardboard with an opening in the front to place your phone. Through that opening are two peeping holes to view your device. Here is how it looks like:
How Does DIY VR Headset Work?
It looks just like cardboard but it’s actually pretty genius. It works because of the lens in the eyepiece. It’s shaped like a disc concave outward to magnify what you see.
If you play a VR-ready video from your phone, you’ll see the video in VR through this DIY VR headset. However, it’s not as clear and crisp as that of a VR headset like the Oculus Quest. But still, you will be able to experience how VR works without breaking the bank.
3 Easy Steps to Make a DIY VR Headset
Now, let’s look at some VR tips and tricks to follow when making your DIY VR headset. By following these simple steps, you’ll be able to experience VR in no time.
How to Make a Cardboard VR Headset?
Step 1: Make the body of your DIY headset
Materials needed:
● Cardboard
● Rubber band
● Magnet
● Biconvex lens (See Step 2)
● Velcro
● Scissors/Cutter
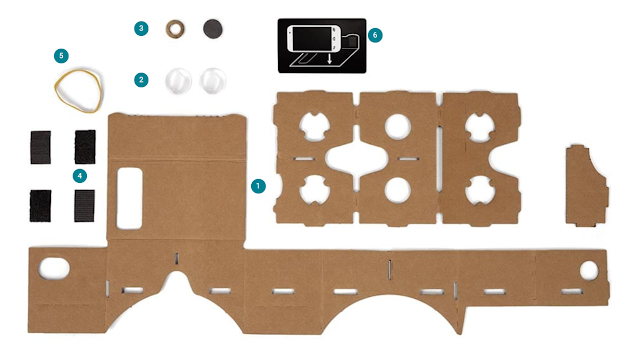
The framework of your device consists of different working parts, mostly cardboard. It’s a good thing that Google made it possible for everyone to make their own Google Cardboard VR.
They open-sourced their specifications for the device, allowing everyone to have the blueprint for the design. You can also download the kit for making Google Cardboard.
Here’s how the individual parts should look like:
If you don’t want to use Google’s kit, you can also make this from scratch. All you need to do is download the template and cut it from your own materials.
NOTE: Do this step very carefully and cut out every piece to match the exact specifications in the template. If you don’t, your phone might fall off because of a poorly-designed framework.
Step 2: Make the eyepiece (biconvex lens)
Materials needed:
● Plastic bottles
● Scissors
● 25mm circular paper templates
● Glue or quick-dry epoxy
● Thin plastic straw
The eyepiece for your DIY VR headset would be a biconvex lens made out of plastic bottle cut-outs. To do this one, you should find a clear plastic bottle that’s not ruined and with a good “curvature”. It should curve at the top like this one:
You’ll need to cut out the eyepieces on the bottleneck. Use a 25mm circular template from a piece of paper and use it as a guide to cut your eyepiece. You’ll need 4 pieces of these.
For a single eyepiece, you will need two plastic bottle cutouts to create a biconvex lens. Put together the two cutouts and glue them together around the circumference of the oval. Leave the straw open for the waterway.
Add a little water to the straw until the lens is full. Cut the straw and seal the waterway using some glue. Make sure that you have a perfectly sealed biconvex lens. Repeat this step to make the other biconvex lens.
NOTE: You can also use a syringe if you’re not comfortable using a straw.
Step 3: Assemble every piece of your DIY VR headset
Now that you’re done creating the working pieces of your DIY VR headset, it’s time that you assemble them into one piece. This won’t require too much of your time because all you need to do is glue and fit pieces together like a puzzle.
Make sure to place the biconvex lens eyepiece on both of the enclosures included in the template. You should be able to fit the lens with ease.
How to Test DIY VR Headset?
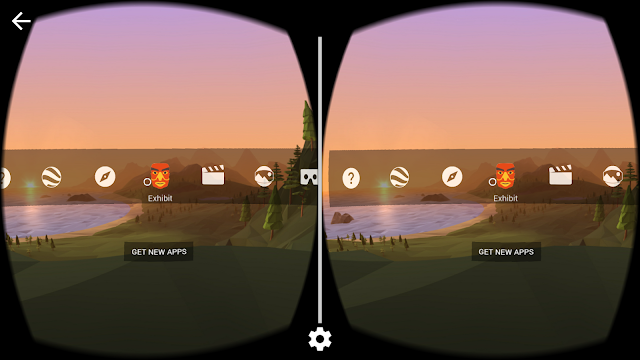
After making your DIY VR headset, it’s time to try it out if it works. You need to prepare your smartphone by downloading a VR app. You can download some VR apps you can find on the Google Play Store or Apple App Store.
But if you may want to begin with Google’s Cardboard app. This app is specially made to be viewed using a Cardboard viewer or the DIY VR headset. It’s also available on the Apple's App Store.
Pros and Cons of Making Your Own VR Headset
Making your own VR headset will always be a cheaper option than buying a commercially produced one. But of course, the more affordable route will have limited features. For example, an Oculus Rift has sensor tracking technology. Your DIY VR headset wouldn’t have this.
Also, a VR headset made of cardboard may be less comfortable than true VR headsets like the Samsung Gear VR that even comes with a controller.
Still, the experience of making your own VR headset may be the most fun and fulfilling part of the process. You get to learn a new skill and the science behind VR technology and VR headset by using simple materials.
Final Words:
A DIY VR headset isn’t that difficult to make. You just need to follow a step-by-step guide and make sure that your measurements and cutting skills are accurate. This can be a great activity for both young and older people who’d like to make things from scratch.
But a word of advice — do not use your DIY VR headset too much. It’s best that you only use it for a few minutes to avoid eye strain and disorientation.


COMMENTS